
Package Party
#25 Tutorial: dynamic masking
Welcome to the twenty-fifth devlog!
This one is delayed by a few days (I try to post them weekly), sorry about that. I am also participating in the GitHub game jam (Game Off 2019), which has a deadline in a few days, so I had to spend some time on that game.
If you’re interested, it’s a relaxing puzzle game with a unique mechanic (you win the level by “falling into each other’s arms”) and a tiny bit of story. The link is: http://pandaqi.itch.io/into-my-arms
Now, back to the tutorial!
Remark: this tutorial is for Godot Game Engine (v3.2), but I know other major game engines also provide similar features and shading languages, so the idea should be applicable anywhere.
Remark 2: I recommend you copy the code examples into your favourite editor and study them there. They aren't really legible on itch.io, without styling.
View obstruction
At the start of the project I talked about the fact that this game offers a lot of spatial freedom, which has a big drawback: players can be hidden behind an object. Especially if it’s a large object, it could be impossible to see where your player is (and how to maneuver your way out of the situation).
In the later levels of the game, I would like the levels to be “big cities”, in which case it’s very likely that your player is behind skyscrapers from time to time. So, view obstruction is an issue I need to solve early on in the development.
My first solution? Shoot a ray from the camera to the player. Any object the ray touches, is considered to be “obstructing” the view, and is turned almost completely transparent. (If you want to know how to do that, I'd like to refer you to this page on the Godot forums: https://godotengine.org/qa/1119/how-to-hide-objects-between-player-and-camera)
Does this work? Yes. Is it the best solution? Eh, no.
These are the problems with this approach:
- An object is either completely transparent, or not. There is no middle ground, which is awkward on large objects. For example, if your player is standing just behind a building … suddenly the whole building vanishes!
- If your player is standing behind multiple objects, or an object is especially dense (many faces between player and camera), this technique doesn’t help at all! Five faces with an alpha/transparency of 0.2, will still add up to be nearly opaque.
- Transparent objects don’t get (correct) shadows.
The better solution
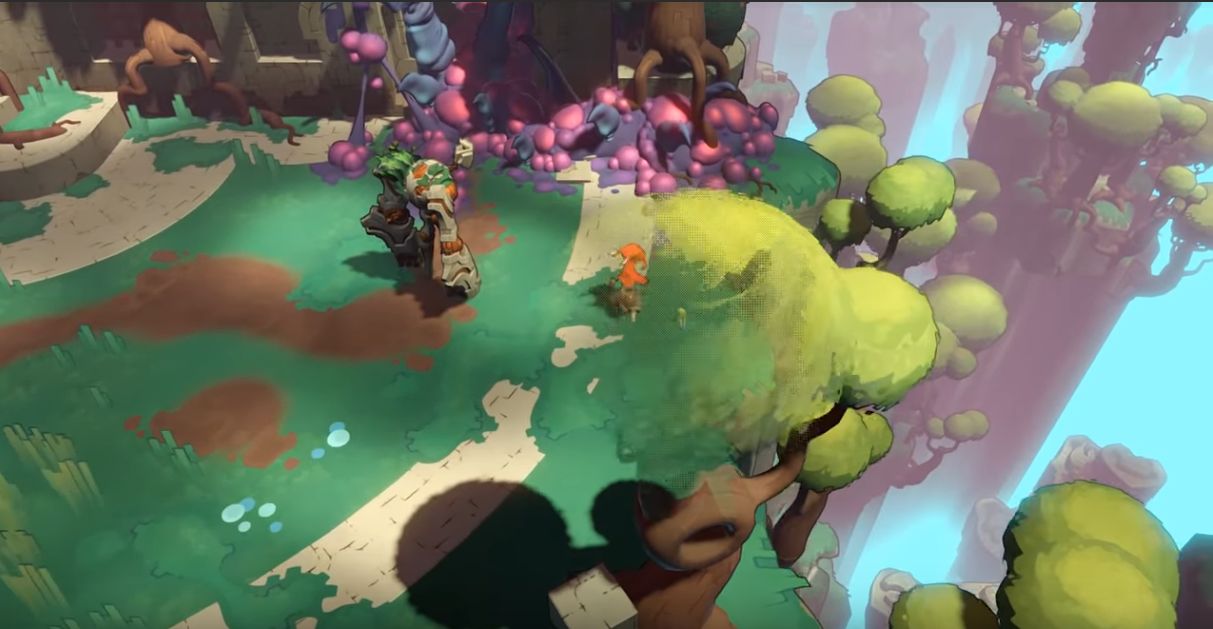
Through the years, I regularly saw games using a technique like this (the last one I can remember is from Hob):
- Check if player is behind an object (same as before, using a raycast)
- If so, create a circle around the player.
- Only cut out the parts of objects that are within this circle. The rest stays where it is (and any shadows and such also stay where they are)
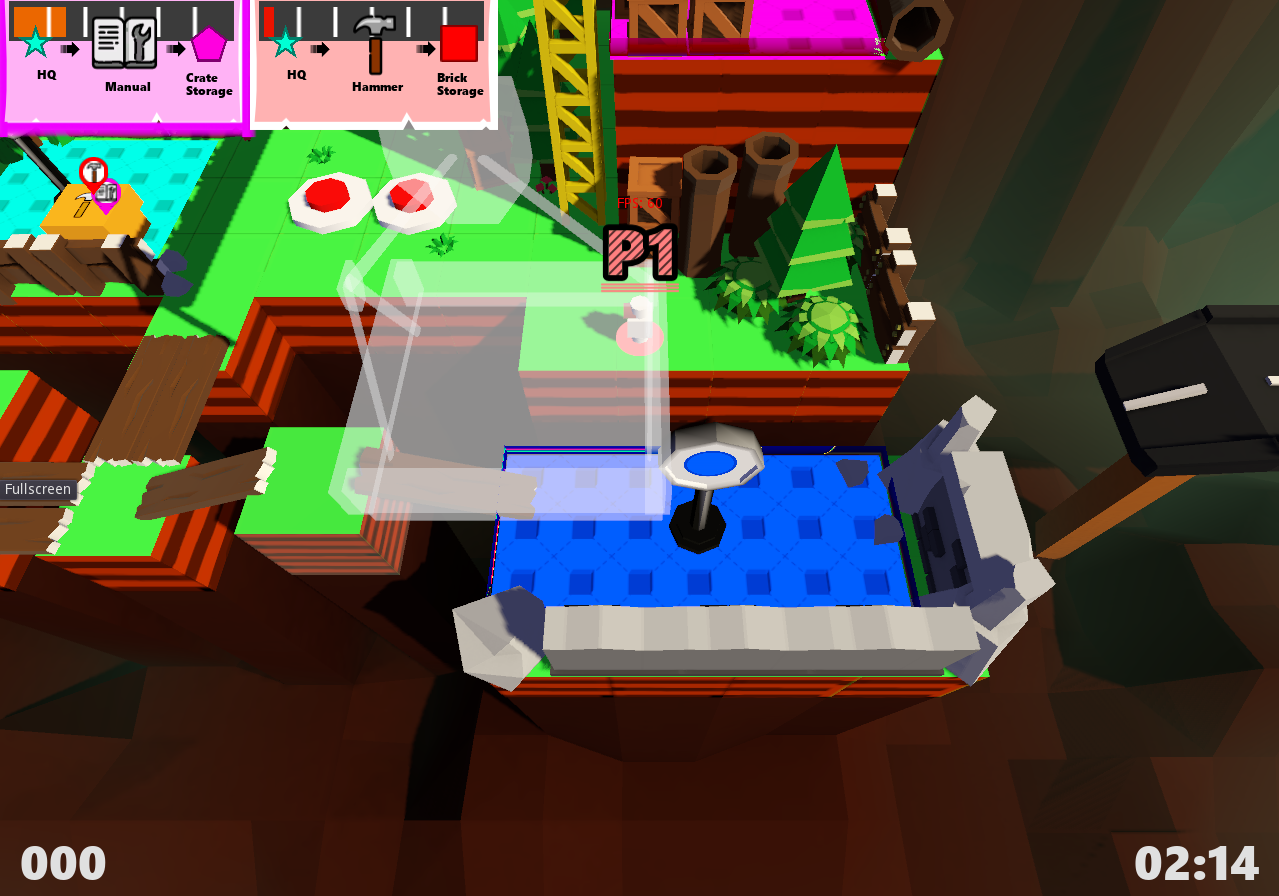
This is very natural, looks smooth, and keeps most of the object intact. But … how do you do it?
I’ve been thinking about this from time to time, but was never able to find a solution.
Until I had a “Eureka”-moment in the shower :p
In hindsight, this technique is simple and obvious, and I don’t know why it took me so long. Here’s the final result:

Anyway, here we go!
Remark: I wasted two days trying other stuff and experimenting. For example, I use a GridMap to display the terrain, and at one point I thought it was better for the game if I also used the same GridMap for any other rectangular objects in the terrain, like buildings. This was a bad idea. I got it to work, but performance was ridiculously bad, and it just didn’t make sense. The GridMap was already called “Terrain” – I should just keep it for terrain.
The basic concept
This is a summary of the steps we’ll be taking:
- Create a texture which contains circles around the players, but is empty otherwise => the mask texture
- Feed this texture into a shader (which is applied to all objects that are hit by the raycast)
- Use the red-value of this texture (we only need a single value) to modify the transparency of an object:
- An empty red value in the mask texture, means we don’t need to change anything.
- If the red value is not empty, we must change the transparency of this object, because we’re apparently within the range of the player.
Step 1: saving player position in the shader
This step uses a shader to find the player position in the world and draw a circle around it.
- Create a Control node
- Add a Viewport node as a child.
- Set its usage parameter to 2D
- Make it full screen (copy whatever window size you’ve set)
- Set Flip V to true.
- Set Transparent BG to true.
- Add a ColorRect node as a child, and make sure it fills the whole screen. (Top right of the editor you should see a button “Layout” > pick the option “Full Rect”)
This ColorRectangle will be creating the masking texture. The Viewport will be necessary at a later step to transfer the texture to another shader. Don’t worry, it will all be explained!
Add a shader to this rectangle. (Go to Material, add new ShaderMaterial, create a new Shader.)
Remember: shaders don’t know anything about other objects in the game. As such, every frame, we need to pass the coordinates of the players to the shaders. First, initialize the variables for them in the shader:
uniform vec2 player1;
uniform vec2 player2;
uniform vec2 player3;
uniform vec2 player4;
uniform float range = 0.1; // radius of circle around players
But there’s another catch: we mustn’t pass the 3D coordinates, but the 2D coordinates on the screen. This shader is nothing more than a 2D texture; it doesn’t understand 3D.
For example, if the player is standing near the top left, the coordinates would be (0.0, 0.0). But if a player was standing near the bottom right, the coordinates would be (1.0, 1.0).
This is the simple piece of code I use (on the ColorRect) to hand the player coordinates to the material:
func update_mask():
    var players = get_tree().get_nodes_in_group("Players")
    for i in range(4):
    // get the 2D position (camera_node should be a reference to your camera)
    var pos_2d = camera_node.unproject_position(players[i].transform.origin)
    // Convert to UV coordinates => divide it by the window width and height
    var screen_uv = pos_2d / get_viewport().size
    // Set the right variable on the shader
    self.material.set_shader_param("player" + str(i+1), screen_uv)
Step 2: Check if pixel is within range of the player
Now the shader knows the UV coordinates of each player on screen. Let’s use it to create circles around the players.
The fragment() function of a shader runs through all visible pixels (“fragments”). Because our ColorRect fills the whole screen, the shader runs the same code through all pixels on the screen.
So the question becomes: how do we determine if any given pixel is within the radius of a player? By …
- Calculating the vector distance between the PIXEL and the PLAYER
- If this distance is within our range, the pixel must be within the circle of a player.
- If not, check the next player.
- If no players fit the description, just leave the pixel empty.
This is the corresponding code. (Note that, when calculating the new color, you’ll probably want to vary the red channel by distance. This makes the falloff a bit smoother, instead of just cutting a completely opaque circle out of the texture.)
void fragment() {
    // initialize stuff: array with players, loop counter, default fragment color
    vec2 player_arr[4] = {player1, player2, player3, player4};
    int i = 0;
    vec4 new_color = vec4(0.0, 0.0, 0.0, 0.0);
    // for each player ...
    while(i < 4) {
        // check if player is within range
        if( length(UV - player_arr[i]) <= range) {
            // if so, update the color to 1.0 in red channel
            new_color = vec4(1.0, 1.0, 1.0, 1.0);
        }
        i += 1; // don’t forget this, we don’t want infinite loops!
    }
    COLOR = new_color;
}
Step 3: Feed mask texture to another shader
If you want, you can test your texture before going to the next step.
Create a Sprite, and set the texture to ViewportTexture, then select the Viewport node you created at the start of the tutorial. The sprite should now display (and update) the texture in realtime.
What should you see? Circles around players, and nothing at other locations.
You might be wondering: why do we need that Viewport node? Can’t we just look at the ColorRect directly?
Well, the Viewport is essential for the next step, because the viewport has a get_texture() function.
This allows us to get the mask texture we just created and feed it to a new shader. The code for this is relatively straightforward:
var viewport_node = <path to your Viewport node>
# update player positions in shader
viewport_node.get_node("ColorRect").update_mask()
# get texture, feed it to the shader applied to obstructing objects (which I’ll explain in step 4)
mask_material.set_shader_param("mask_tex", mask_node.get_texture())
In the last step, I will show how to use this texture (which is now saved as mask_tex in the other shader)
Step 4: Cut holes in objects (based on mask texture)
Every obstructing object (which means it’s hit by the raycast between camera and player) has the material mask_material applied.
(Of course, once the object is NOT hit by the raycast anymore, it receives its old material again.)
This is another ShaderMaterial, which uses our mask texture to vary the transparency of objects. The code looks like this:
shader_type spatial;

// This is the magic setting for shadows!
// With this enabled, shadows remain consistent, even when transparency changes
render_mode depth_draw_alpha_prepass;

uniform sampler2D mask_tex;
uniform sampler2D albedo_tex;

void fragment() {
    // flip screen UV on the y-axis (because OpenGL has a flipped Y axis)
    vec2 screen_uv = SCREEN_UV;
    screen_uv.y = (screen_uv.y) * -1.0 + 1.0;

    // first of all, keep the old colors/texture of the object intact
    // without this, each object would just go to the default gray color
    ALBEDO = texture(albedo_tex, UV).rgb;

    // THIS IS THE IMPORTANT BIT: Set alpha based on mask texture
    // If the red channel is 0, the object is just completely opaque (ALPHA = 1)
    // Otherwise, the ALPHA is reduced by the red channel. A value of 1 means this pixel is invisible.
    ALPHA = (1.0 - texture(mask_tex, screen_uv).r);
}
That’s it!
I hope this tutorial was clear and informative! If not, feel free to leave a comment.
I feel like there should be faster/less roundabout way to do this. For example, is there really no way to just get the texture directly from the ColorRect, instead of going through a viewport?
But this technique works and my performance is still steady, so I’m not too worried about that.
Remark: my first try, I created the mask texture in code. I created a new image, set the pixels around players to the right value, converted this image to a texture, then fed it into the mask_material. As you might expect: this was TERRIBLE for performance. Even when I severely lowered the resolution of this mask texture to something like 16 pixels in width, it wasn’t optimal. Now, with a shader and a viewport, I can get smooth circles without performance cost!
Now back to delivering packages
I learned many interesting things last week, many related to shaders, so there will be more tutorials in the future.
I’m also mostly done with rewriting the core system to support more delivery types and other fun stuff. I wanted to write about it today, but it’s not really interesting to read about code and underlying architecture – so I’ll wait until I have some visuals and video to show!
Until next devlog,
Pandaqi
Leave a comment
Log in with itch.io to leave a comment.